LGTOOL 2.24 released Optimus L3 unlock and more

LGTOOL
by SEtool team

Version 2.24 released!

New version highlights:
Highly improved Optimus L3 series support
Improved LG&HTC IMEI calc algo


DIRECT DOWNLOAD LGTOOL & SGTOOL
DOWNLOAD LGTOOL & SGTOOL FROM GOOGLE


New for LGTOOL direct services:

LG E400, E400B, E400F, E400G, E400GO, E400R

- Direct Unlock
- Repair IMEI
- Repair Bluetooth


New for LGTOOL remote services:

LG D802TR, D801Z

- calculate unlock codes


Other changes in LGtool, SGtool and remote services:

- HTC IMEI calc algo improved
- LG IMEI calc algo improved


You can view our official reseller list here. Resellers with credits available are marked as “In stock”, please contact them now to avoid disappointment.

Note:
Since v. 2.0 new license system for activated users is added. Please do not install LGtool 2.xx until you purchase LGtool license (paid activation).

Install Jelly Bean 4.1.1 on Qmobile Noir A8 download now


Warning: Follow the guide at your own risk, We will not be held responsible if anything goes wrong by following the steps mentioned below

Installing Jelly Bean 4.1.1 on Qmobile A8 procedure:


  1. First of all make sure your phone is ROOTED. If it’s not, follow out guide on
  2. Now install ClockWorkMod Recovery from Google play or anyother external site on your Qmobile Noir A8.
  3. Download one of the following two ROMs:
IncPak’s Jelly Bean 4.1.1 ROM for Qmobile Noir A8 [Link 1] [Link 2]
WinGoku’s Jelly Bean 4.1.1 ROM for Qmobile Noir A8 [Link 1]
I recommend the Incpak's ROM as it is running on 2 of my phones...
  1. Now copy this download .zip file to your SD Card;
  2. Power Off your Noir A8;
  3. Boot your phone into Recovery mode: Hold down the POWER + VOLUME UP buttons, release the POWER button when you see the boot logo;
  4. Make a backup: select backup and restore, then backup. When it is done select Go Back;
  5. Now perform the following Wipes:
    Select Wipe/Data Factory Cache;
    Select Wipe Cache Partition;
    Go to advanced and select wipe dalvik cache;
    Go back to the main menu.
  6. Now select Select Install zip from sdcard, then Choose zip from sdcard and then select the .zip file that you copied to your SD Card and select Yes;
Once the installtion is completed, your Qmobile will reboot into JellyBean 4.1.1.
Please leave you feedback on this guide.Thank you

UPDATE SP_Flash_Tool_v3.1332.0.187 By shohag-dumuria

SP_Flash_Tool_v3.1332.0.187


Download

Smart Phone Multiport Download SP_MDT_exe_v3.1320.00.00 Download Now

SmartPhone Multiport Download
Ver:3.1320.00


Download

Micromax X321 Flash file 100% tested many time

Micromax X321 Flash file 100% tested many time
model: micromax x321
cpu: 6530a
file ver:6530_SF_GD25LQ64_2013_07_18 10_02_47 PM


Password
Mosh@rof Telecom
Micromax X321 Flash file  

Sony Xperia st26i unlock done by setool

SIGNED MODE (USING SERVER)
ALTERNATIVE SECURITY BYPASS ENABLED
CFG:110010000000
PLEASE ATTACH TURNED OFF PHONE NOW
PRESS AND HOLD "BACK" OR "VOLUME DOWN" BUTTON ...

RUNNING S1_BOOT VER "R10D030"

ACTIVE_COMP_AID : 0002
HWCONF_AID : 0002
LOADER_AID : 0002
BOOT_AID : 0002

DEVICE ID: AEE07650030513EB1FC6B796CC734BB32A25D1B2
FLASH ID: "0003/00000015"
LOADER VERSION: "R5D030"

PHONE IMEI : 35438605033079
Checking for signature ...
Waiting for calculation process ...
RESPONSE: "SUCCESS" [1520]

REMOVE SIM CARD FROM PHONE
FULLY POWER ON PHONE
ENABLE "USB DEBUGGING" IN PHONE:
MENU,SETTINGS,APPLICATIONS,DEVELOPMENT
INSTALL ADB DRIVERS IF NEEDED

WARMING UP ...
CHECKING ROOT ACCESS ...
GETTING ROOT ACCESS ...
PROCESSING ...
ST26i [0FCE_5188_YT9003CWFE]
FINALIZING ...
Unlock DONE
Elapsed: 112 secs

Why to Update Firmware

Why to Update Firmware?

The question is why we should update the firmware of our maemo device? There are many reasons to it like:

* Bug fixes in new firmware
* Stability and improvement in new firmware
* You have corrupted the software of your device
* A virus has corrupted it, though it is very rare if you take little care
* Introduction of new feature in the firmware
* And sometimes for debranding

Methods of Firmware Update:

There are three common and easy methods of updating the firmware of N900.
1. Via Nokia Software Updater:

It is easy and most recommended method to upgrade the firmware of maemo device. If there is new firmware update is available, this is the recommended way to do it. You can see more details here how to update using NSU.
2. Manual Method using Flasher:

Here I want to explain the manual method of flashing your device. This method is recommended if you are reinstalling the same/latest (but not the newest which will be available through NSU only) firmware which you have already on your device.

Step by Step Method of Flashing using Flasher:

This method is windows based method (esp XP), but if you have got other operating system (Mac or Linux), you can get a link.

* Download and install the latest version of Flasher (e.g. maemo_flasher-3.5_2.5.2.2.exe).
* Download the latest firmware (.bin) file and save to ‘c:\Program Files\maemo\flasher-3.5\’
* Fully charge the battery.
* Unplug charger and switch off the device.
* Open the command prompt on XP. Start + Run. Type cmd and press Enter.
* Change directory to the flasher program

cd "c:\Program Files\maemo\flasher-3.5"

* Connect the USB cable while pressing ‘u’ key on the N900 (The detailed procedure of connecting the N900 is here).
1. Turn off Maemo device
2. Press and hold down key ‘u’
3. Connect USB cable between Maemo device and host PC while holding down key ‘u’
4. When USB cable gets connected it powers Maemo device and set’s it to flashing mode
5. When USB icon appears on right upper corner Maemo device is in flashing mode
6. You can release key ‘u’
* Run the following command:

flasher-3.5.exe -F RX-51_2009SE_1.2009.42-11_PR_COMBINED_MR0_ARM.bin -f -R

The update will take about 4 minutes after which the N900 will reboot and display the Welcome screen with Regional settings.

You may experience problem if you are running windows seven/vista. You will have to flash the device in xp mode under Seven x64 and it will work perfectly.
3. via Seamless Software Update (SSU):

This method is same as FOTA (firmware over the air) in symbian mobiles, but it has been named as Seamless Software Update (SSU).

Your N900 will notify you of an update when one becomes available, just as it does for application updates. You may initiate the update process immediately or, if you prefer, ignore it for the moment and wait until your phone is, say, fully charged and on a good WiFi connection.

The process is:

1. A blinking notification–the same as appears when application updates are available–appears in the status area of your N900.
2. Tapping the notification opens the Application Manager which automatically shows the available update. (Should you decide to hold off on installing the update for any reason–busy, low battery, on expensive data connection, etc.–you can close Application Manager. The SSU will remain waiting in the “Update” area of Application Manager until you’re ready.)
3. Tap the update to begin the download and installation process.
4. Your N900 will prompt you to make a new backup of your data and settings just in case. Making a backup may be skipped, should you want to throw caution to the wind.
5. Your N900 will close all open applications.
6. Your N900 will download the update.
7. Your N900 will automatically install the update.
8. Your N900 may reboot.
9. Done.

vıdeo Link here please CLICK HERE

Full Unlock for Lumia 710 & 800 see step by step

INSTRUCTIONS

Requires an unlocked bootloader (a.k.a. qualcomm development bootloader).
Easy to check: Turn the phone OFF, then press and hold VOLUME UP + POWER until you notice a short vibration. Plug in to the computer. If the phone turns up in disk mode (USB Mass Storage Device), then you have an unlocked bootloader. IF you're in Windows, it will ask if you want to format the disk. SAY NO OR IT WILL EXPLODE (it won't explode but you might break it)
If the device detected by the computer is Nokia DLOAD you have a locked bootloader and you're out of luck, at least for now.
but it's more involved to find the appropiate partition:
dd if=./os-new.nb of=/dev/sdX9
Where X is the disk detected by your linux distribution.
After that, you'll need to hard reset the phone. Hold Power button for 10 seconds to exit Qualcomm's disk mode, and press and hold POWER+VOLUMEDOWN+CAMERA until you feel the phone vibrate. After that, RELEASE power button but KEEP HOLDING volume down + camera for five or more seconds. This will trigger the hard reset.

Lumia 800: Full Unlock
sdb3.rar: Flash it to PARTITION #3. It contains 12070's amss & adsp. Not absolutely required but if you have an older version this should give you better battery life.
sdb3.rar
OS-NEW:
As always, flash it to PARTITION #9.
Part1: os-new.part1.rar
Part2: os-new.part2.rar
Part3: os-new.part3.rar
Part4: os-new.part4.rar

Alternate ROM with Full Unlock + Some apps:
Part1: FU_12070_with_apps.part1.rar
Part2: FU_12070_with_apps.part2.rar
Part3: FU_12070_with_apps.part3.rar
Part4: FU_12070_with_apps.part4.rar
Apps preinstalled:
DS Supertool
File Deployer
Metro Theme
WebServer
WinTT
WM Device Center

Nokia Sl3 Unlock Service

1. Download NSS Pro (v 0.48 minimum required) and extract to a directory on your computer(do not run NSS from WinRar directly!)
2. Start NSS Pro, then go to Simlocks, then Settings
3. Check the 'Auto download extra files on program startup

4. Close the program, then start it again. Please wait for the download to finish

5. Power up your phone and connect to the PC via USB cable
6. Select OVI mode, make sure all drivers are installed correctly
7. If all ok, the phone should appear in the usb devices list at the bottom of
NSS, when USB connection is selected
8. Click on the device, then press the Detect button. If all ok, the IMEI number and the
phone model should be displayed in the bottom bar of the program

9. Go to Simlocks, then BB5, click on the Read button
10. Number of details should be printed, including that your phone has 15 digits unlock code
and it's locked, including the MCC+MNC of the Network, so you can continue

11. Click on the Submit to Server button, it's a long process, more drivers will be installed.
12. It is ok to get error in step 11, you can try 2-3 times or more, until you get error that
you need to save your un/pw

13. This means your phone is supported for unlock, you can go here and pay with your PayPal account or a credit card, please click on the unlock service.
14. Please allow few hours for the payment to be processed, when done you will receive an e-mail
confirming the payment and providing you with user name and password
15. Then connect the phone again, and go to Simlocks, then SL3 Servers
16. Click Update, then select GenieProjects server by clicking once on it

17. Enter your User Name and Password in the boxes below, then click Save
18. Now go to the BB5 tab and click Submit
19. You should see that your phone is submitted for processing

20. After that you can check the status of the process by clicking again the Check button in SL3 BF

21. After few hours the status of your job should change from idle/active to done, and you should see also an unlock code

22. Go to the SL3/BB5, manually copy the code to the Code box (just he code, 15 digits), select as
level 7 and click Upload

You are suppose to get success. If you get an error, try to load the code using the phone keypad, but make sure you enter the full string from the screen (#pw+...)

If you still getting error, you can request all seven levels from the server via the 'Get cod' button in the Simlock->SL3 Servers tab, just make sure you enter your IMEI first. Usually entering of level 1 via the phone keypad will fix a problematic phone.

That's it! If you like, you can check the status of the locks by pressing Read again

reed more

NCK Dongle v13.8 Update Released - The Perfection of World's First- [23/11/2013]

Cold Winter?!!! - We just made it hot for you

Added Today:

Alcatel SPD

OT-316 - IMEI Repair (Change) World's First* /Write Firmware/Unlock Via Flashing/Format.
OT-316A - IMEI Repair (Change)/Write Firmware/Unlock Via Flashing/Format.
OT-316S - IMEI Repair (Change) World's First* /Write Firmware/Unlock Via Flashing/Format.
OT-1051 World's First* - IMEI Repair (Change)/Write Firmware/Unlock Via Flashing/Format.
OT-236G - IMEI Repair (Change)/Write Firmware/Unlock Via Flashing/Format.
OT-316D - IMEI Repair (Change)/Write Firmware/Unlock Via Flashing/Format.
OT-1051D World's First* - IMEI Repair (Change)/Write/Unlock Via Flashing/Format.
OT-3116N World's First* - IMEI Repair (Change)/Write Firmware/Unlock Via Flashing/Format.
VM575 (OT-1060) - Write Firmware/Unlock Via Flashing/Format/Reset User Area.
OT-1062 - Write Firmware/Unlock Via Flashing/Format/Reset User Area.
OT-2040G World's First* - Write Firmware/Unlock Via Flashing/Format/Reset User Area.
OT-1063 World's First* - Write Firmware/Unlock Via Flashing/Format/Reset User Area.
OT-1060D - Write Firmware/Unlock Via Flashing/Format/Reset User Area.
OT-2040D World's First* - Write Firmware/Unlock Via Flashing/Format/Reset User Area.


Alcatel Android

OT-Fire - Unlock Code Calculation via IMEI & PID.
Code:
AEUY1, TIIT1, TLCO3, TLBR1, TLUY1
TLMX1, TBDE1, TNHU1, TBGR1, TNME1
TNRS1, TBHU1
OT-4012 - Unlock Code Calculation via IMEI & PID.
Code:
AEUY1, TIIT1, TLCO3, TLBR1, TLUY1
TLMX1, TBDE1, TNHU1, TBGR1, TNME1
TNRS1, TBHU1
Alcatel Broadcom (Unlock Already Supported)*


OT-927 - Write Flash/Repair Via Flashing/Change Language Via Flashing.
OT-906 - Write Flash/Repair Via Flashing/Change Language Via Flashing.
OT-913 - Write Flash/Repair Via Flashing/Change Language Via Flashing.
OT-978 - Write Flash/Repair Via Flashing/Change Language Via Flashing.
OT-979 - Write Flash/Repair Via Flashing/Change Language Via Flashing.
OT-V860 - Write Flash/Repair Via Flashing/Change Language Via Flashing.
VODAFONE SMART 2 - Write Flash/Repair Via Flashing/Change Language Via Flashing.
MTC-962 - Write Flash/Repair Via Flashing/Change Language Via Flashing.
OT-960 - Write Flash/Repair Via Flashing/Change Language Via Flashing.
OT-983 - Write Flash/Repair Via Flashing/Change Language Via Flashing.


HAUWEI Mobile

Ascend Y320 - Unlock Code Calculation via IMEI.

Download From Support Area (Registration Required).

NCK Dongle

Direct Link (User % Pass from support Site Required).

http://nckdongle.com/wp-content/uplo...etup_v13.8.exe


Official Website:

NCK Dongle

China Samsung i9500 s4,i9082 grand 4.2.2 copy imei solution

China Samsung i9500 s4,i9082 grand 4.2.2 copy imei solution
i9500 s4 mtk 6575 4.2.2

Engineer menu code - * # * #889988# * #*


also try this * #889988# * #*

open gprs option and write imei

or

After
CDS Information
After
Radio Information
Then, for SIM1
Phone1
After
IMEI number of the phone that you scrap
AT + EGMR = 1.7, "123456789012345" (without the quotation marks will be exactly in the same way)
After
Pressing and changing IMEI number Send Command in at
For Sim2
Phone2
After
IMEI number of the phone that you scrap
AT + EGMR = 1.10, "123456789012345" (without the quotation marks will be exactly in the same way)
After
Pressing and changing IMEI number Send Command in at

Samsung i9500 s4 mtk 6572 4.2.2 imei problem solution here

First entering the following code
try all one by one

* # * # 3646633 # * # *

*#3646633#

*#3646633#*#*


After
CDS Information
After
Radio Information
Then, for SIM1
Phone1
After
IMEI number of the phone that you scrap
AT + EGMR = 1.7, "123456789012345" (without the quotation marks will be exactly in the same way)
After
Pressing and changing IMEI number Send Command in at
For Sim2
Phone2
After
IMEI number of the phone that you scrap
AT + EGMR = 1.10, "123456789012345" (without the quotation marks will be exactly in the same way)
After
Pressing and changing IMEI number Send Command in at


If not work this code

use this database with this tool -Maui META 3G ver 6.1308.0


database
database 6572

tool

MauiMETA_3G_exe_v6.1316.1.upload.ASHAKAAS.INDONESI A RAYA

China Samsung i9082 4.2.2 mtk 6575 grand imei problem solution here

i 9082 4.2.2 mtk 6575 grand

install this apk

open app inside 2 option
Mtk Android
or MTk eng. mode
select mtk eng
go to GPRS IMEI


GPRS in Up Side SIm 1 or SIm2 option Tick

100000000% success

download solution


grand mtk6575 solution

MIRACLE EAGLE EYE BOX VER 1.65 SUPPORT FOR 8825/6825 DISCUSION THREAD

Miracle Eagle Eye Box
1.65
Whats New
Code:
v1.65
1.Add compatible for USB3.0 port 
2.SPD Add 8825  write for *.gz package
3.SPD Modify ADB ROOT
4.Coolsand Modify pinouts-scan
5.SPD Modify a bug for searching IMEI from file

Download Now

Samsung Copy N7100 Copy MTK Android Factory Rom Share and tested By AzimBahar
Octoplus/Octopus Suite v1.2.6 - added unlock bootloader for Sony


Octoplus/Octopus Suite v1.2.6 is out!

Added Unlock Bootloader for a range of Sony Xperia devices


Octoplus/Octopus Suite v1.2.6 Release Notes
- Sony Xperia C1504 - added Unlock Bootloader (fastboot), improved* Direct Unlock and Repair IMEI operations.
- Sony Xperia C1505 - added Unlock Bootloader (fastboot), improved* Direct Unlock and Repair IMEI operations.
- Sony Xperia C1604 - added Unlock Bootloader (fastboot), improved* Direct Unlock and Repair IMEI operations.
- Sony Xperia C1605 - added Unlock Bootloader (fastboot), improved* Direct Unlock and Repair IMEI operations.
- Sony Xperia ST21a - added Unlock Bootloader (fastboot), improved* Direct Unlock and Repair IMEI operations.
- Sony Xperia ST21i - added Unlock Bootloader (fastboot), improved* Direct Unlock and Repair IMEI operations.
- Sony Xperia ST21a2 - added Unlock Bootloader (fastboot), improved* Direct Unlock and Repair IMEI operations.
- Sony Xperia ST21i2 - added Unlock Bootloader (fastboot), improved* Direct Unlock and Repair IMEI operations.
- Sony Xperia ST23a - added Unlock Bootloader (fastboot), improved* Direct Unlock and Repair IMEI operations.
- Sony Xperia ST23i - added Unlock Bootloader (fastboot), improved* Direct Unlock and Repair IMEI operations.
- Sony Xperia ST23a2 - added Unlock Bootloader (fastboot), improved* Direct Unlock and Repair IMEI operations.
- Sony Xperia ST23i2 - added Unlock Bootloader (fastboot), improved* Direct Unlock and Repair IMEI operations.
- Sony Xperia ST26a - added Unlock Bootloader (fastboot), improved* Direct Unlock and Repair IMEI operations.
- Sony Xperia ST26i - added Unlock Bootloader (fastboot), improved* Direct Unlock and Repair IMEI operations.
Octoplus/Octopus Server Credits Consumption:
  • for users WITH Octopus/Octoplus/Medusa card - "0" credits (FREE) per "Unlock Bootloader" operation;
  • for users WITHOUT Octopus/Octoplus/Medusa card - "2" credits per "Unlock Bootloader" operation.


Note!
* from now on, after "Direct Unlock" and/or "Repair IMEI" operations, it is possible to write firmware
for mentioned above devices with any known Sony servicing tool that uses original Sony loaders;
also phone's fastboot (bootloader) will be unlocked.

** to write firmware with any known Sony servicing tool that uses original Sony loaders for
mentioned above devices, which were serviced (unlocked or have repaired IMEI) by previous
Octoplus/Octopus Suite Software versions, you need to perform "Unlock Bootloader" operation.

Download Octoplus/Octopus Suite v1.2.6

Sigma Software v1.31.01 is out. Check details inside

SigmaKey Software v1.31.01 released!

With this release we've added Unlock via FTM-mode for a wide range of Qualcomm based ZTE smartphones, added Unlock support for new firmware version for Motorola MB520 and much more...

More info and discussion are HERE.

Sigma Software v1.31.01 released some model added this version

Sigma Software v1.31.01 is out!

Qualcomm Platform Update:


1. Added Unlock via FTM-mode for the following ZTE models:

♦ Blade III Pro
♦ Blade E / V956
♦ Blade G
♦ Blade V
♦ Cosmote Xplore
♦ N880G
♦ N880F
♦ N881F
♦ N881E
♦ TWM Amazing A2
♦ V880G
♦ V889F
♦ V955

From now on you can unlock those devices via 2 modes:
either via download mode, or via FTM mode (much faster).
Repair IMEI via download mode only.


2. Fast Direct Unlock / Repair IMEI database updated with:

♦ ZTE Blade: TM_P729TV1.0.0B07
♦ ZTE V880e: GB_ENTEL_P772A11V1.0.0B05


TI Platform Update:


Added Unlock support for new firmware version for:

♦ Motorola MB520: KOBE_U3_5.35.0


MTK Platform Update:


Following devices added to the list of supported:

♦ NGM Forward Infinity (MT6589)
♦ Clockphone Rider M810 (MT6525)
♦ BLU Jenny TV T172T (MT6525)


Everyone has their own dreams.
We're helping you to turn them into goals and therefore make 'em a reality!


Download Sigma Software v1.31.01

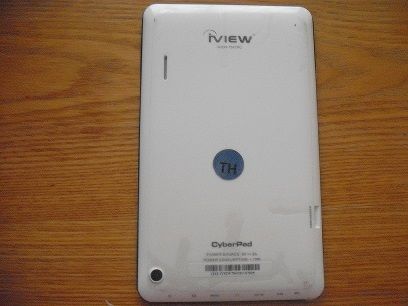
iview 754tpc-cyberpad 754tpc factory firmwares update and tested download link

his is a 7 inch dual camera a13 f9 type of tablet

the factory firmware download site is very informative and does support several other iview models but has terrible download speeds so I have mirrored the new firmware update from the iview support site to make this update process much smoother for you for the same model I have


excellent
tutorial for how to flash this model including pictures
http://iviewus.com/download/754TPC_INSTRUCTIONS.pdf


the mirror for the iview 754tpc 4.1 upgrade - see the iview site for 4.0 version firmware

YSL-F727-754TPC-A(4.1)_dblgt2005_V2.0.6_20130620_hdj - Download - 4shared - thomas jordon


here are some pics of this model


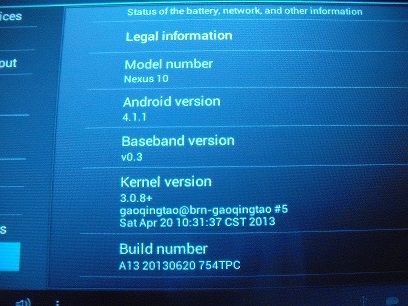
after the update the only thing changed is the android version - the home screen and wallpaper is same as 4.0 pics but the device being Jelly Bean does have several more features and usb debugging is set to on automatically in this updated firmware

now you can use the Uberizer and totally customize the device to your likings - here is a teaser for you of what the new v1.7 Uberizer [soon to be released] can do to it

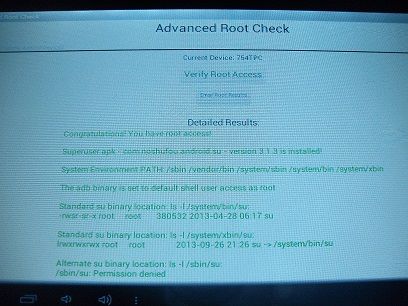
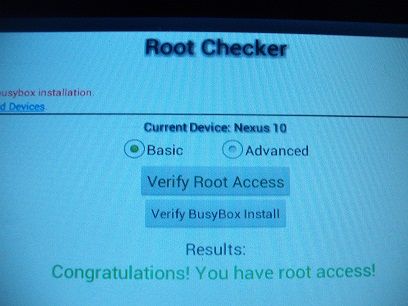
full root using option 'c' then '17' in Uberizer


nexus 10 for extended app compatibility - new added feature only available in the new upcoming Uberizer v1.7 release


Micromax A67 root & patten lock done by miracle box

Micromax A67 root & patten lock done by miracle box
use Miracle_Box v1.65
select spd 8825/6825

info
Connecting to Phone,Wait..ok
Hardware:sc8825
Board:sp8825ea_nosdcard
CPU ABI:armeabi-v7a
Manufacturer:Micromax
Model:Micromax A67
Android Ver:4.0.3
bootloader ver:unknown
USB config:mass_storage,adb,vser,gser
User:zenghaiqi
Baseband verM_BASE_13B_W13.16_P7|sc8825_modem|07-11-2013 14:51:27
Build number:PA287AN_KMOEB_DM451_Micromax_A67_FOREIGN_V1 .1.7_user_r20674
IMEI1: 911328101632167
Root: Not Root
Done

root it 1st

Connecting to Phone,Wait..ok
checking info...
Model:Micromax A67
Android Ver:4.0.3
ROOT OK! Reboot!

wipe data

Connecting to Phone,Wait..ok
Hardware:sc8825
Board:sp8825ea_nosdcard
CPU ABI:armeabi-v7a
Manufacturer:Micromax
Model:Micromax A67
Android Ver:4.0.3
bootloader ver:unknown
USB config:mass_storage,adb,vser,gser
User:zenghaiqi
Baseband ver:
Build number:PA287AN_KMOEB_DM451_Micromax_A67_FOREIGN_V1 .1.7_user_r20674
IMEI1:
Root: Rooted(su)
Done
Connecting to Phone,Wait..ok
Wipe data...
Done

CKTEL ST23i MSTAR Dead Phone Recover By Volcano Box Firmware here try this 100% tested

CKTEL ST23i MSTAR Dead Phone Recover By 
Volcano Box Firmware here 
try this 100% tested

Lumia Win7 IMEI change keystore repair, etc - ChimeraTool

Dear BruteforceMarket and Chimera customers,

We are announcing our world first update for Nokia Lumia Win7 platform.

Update will be available for all customers from 25. November 2013, but beta testers are able to try it out.


Some unique functions you can have with us:
https://pics.chimeratool.com/logos/nokialogo.png

Nokia Lumia Win7 platform

Lumia 800, 710 without TP, just a single USB cable
other win7 models with TP
  • Direct unlock, reset NCK counter - (world first)
  • Read original NCK from phone - (world first)
  • IMEI repair function (change IMEI or repair to original one) - (world first)
  • Repair phones with damaged keystore (can not be flashed after rooting) - (world first)
more coming soon.
visit chimeratool.com website for more informations

SeTool New version v1.1403 Released

SeTool New version v1.1403 Released many phone supported this update 
see and download now

Code:
- approved sony msm722xA-based phones alternative bypass unlock 
- completely changed interface with android debug bridge 
- fixed some internal bugs
Latest Update v1.1403 Download Links

HOT FILE LINK


MEDIA FIRE LINK


4 SHARED LINK

Octoplus Box JTAG v1.4.1 - world's 1st Xperia Tipo, Tipo Dual full phone repair

Octoplus Box JTAG Software v1.4.1 Release Notes
  • Added support for the following models:
- Sony ST21i - added Dead Boot Repair and world's first Phone Repair (Dead Boot Repair + Security Recalculation)!
- Sony ST21a - added Dead Boot Repair and world's first Phone Repair (Dead Boot Repair + Security Recalculation)!
- Sony ST21i2 - added Dead Boot Repair and world's first Phone Repair (Dead Boot Repair + Security Recalculation)!
- Sony ST21a2 - added Dead Boot Repair and world's first Phone Repair (Dead Boot Repair + Security Recalculation)!
  • Added support for new Сore ID (901B10E1) for MSM7225 CPU.
  • Added support for new Сore ID (203E20E1) for MSM7227 CPU.
  • Added support for new Сore ID (106030E1) for MSM7227A CPU.
  • Added support for new Сore ID (204210E1) for MSM8260 CPU.
  • All pinouts and Repair procedures are described in Software manuals ("Help" button in the Software).
More info and discussion are HERE

Octoplus Box JTAG v1.4.1 - world's 1st Xperia Tipo, Tipo Dual full phone repair have this version


Octoplus Box JTAG Software v1.4.1 is out!

Added:
world's first Phone Repair for Sony Xperia ST21i, ST21a, ST21i2, ST21a2!

Octoplus Box JTAG Software v1.4.1 Release Notes

  • Added support for the following models:
- Sony ST21i - added Dead Boot Repair and world's first Phone Repair (Dead Boot Repair + Security Recalculation)!
- Sony ST21a - added Dead Boot Repair and world's first Phone Repair (Dead Boot Repair + Security Recalculation)!
- Sony ST21i2 - added Dead Boot Repair and world's first Phone Repair (Dead Boot Repair + Security Recalculation)!
- Sony ST21a2 - added Dead Boot Repair and world's first Phone Repair (Dead Boot Repair + Security Recalculation)!
  • Added support for new Сore ID (901B10E1) for MSM7225 CPU.
  • Added support for new Сore ID (203E20E1) for MSM7227 CPU.
  • Added support for new Сore ID (106030E1) for MSM7227A CPU.
  • Added support for new Сore ID (204210E1) for MSM8260 CPU.
  • All pinouts and Repair procedures are described in Software manuals ("Help" button in the Software).


Note: after Phone Repair operation, you need to re-flash the phone with Octopus/Octoplus Suite Software.
Also note: after Phone Repair procedure, your phone will have "00000000000000" IMEI and will be locked;
to perform Unlock / Repair IMEI use Octopus/Octoplus Suite Software.
Octoplus - the best there is with the most important updates only!
Download Octoplus Box JTAG Software v1.4.1

MIRACLE BOX VER 1.65 SUPPORT FOR 8825/6825 DISCUSION THREAD (20-nov-2013)

MIRACLE BOX VER 1.65 SUPPORT FOR 8825/6825 DISCUSION THREAD GOOD 
UPDATE DOWNLOAD NOW
WORKING ALL ANDROID PHONE

What's New
1,Add compatible for usb3.0 post
2,spd add 8825 write for gz package
3,spd modify adb root
4,coolsand modify pinouts-scan
5,spd modiy a bug for searching imei from file

Sigma 1.31.00. 20+ new Motorola OMAP smartphones supported here download now

SigmaKey Software v1.31.00 and Sigma Firmware v1.33 released!

Today we giving you the most expected update of this year with World’s first support for over 20 long-awaited OMAP-based Motorola devices A, MB, ME, XT-series.
Be the first to benefit from the solution!

More info and discussion are HERE.

Sigma 1.31.00. 20+ new Motorola OMAP smartphones supported see and download now

 Sigma 1.31.00. 20+ new Motorola Omap, smartphones supported see and download now
Sigma Software v1.31.00
and Sigma Firmware v1.33 are out!

The most important things are the hardest to achieve, but as you might've noticed,
there's nothing impossible for inspired people, and trust us, we have a lot of enthusiasm
to keep you amazed and surprised!
Today we're proud to present you the most expected update of this year
with support for over 20 long-awaited OMAP-based Motorola devices!
Be the first to benefit from the solution!


TI Platform Update:

Added direct unlock for the following line of Motorola smartphones:
A853 Milestone
A853 Milestone LatAm
A953 MILESTONE 2
MB502 Charm LatAm
MB502 Charm US
MB508 Flipside
MB511 Flipout
MB511 Flipout at&t
MB520 Bravo
MB525 Defy
MB526 Defy Plus
MB611 Cliq 2
ME511 Ruth
ME525 Defy
ME525 Defy Plus
ME722 MILESTONE 2
XT701 Sholes Tablet
XT702 Milestone
XT711 Sholes Tablet
XT720 Milestone
XT720 MOTOROI
Mind that you need to root the smartphone before unlocking.


Main advantages of the solution:
Super-1-click simple unlocking solution via usb cable (root required).
Works with all firmware and baseband versions.
Ideal solution for phones that can't be unlocked via unlock codes
due to their absence in the carrier’s database.
Supports phones with blocked counter of code entries
attempts / disabled unlock code entry field.
Saves all user's data after unlocking.
Everything you'll need to unlock a device (manuals, drivers, etc.),
you will find in the corresponding sections of Sigma website.


Download Sigma Software v1.31.00 

See And download now enjoy it ,

Samsung Galaxy Note II GT-N7100 receives official Android 4.3 Jelly Bean update

CHANGES AND IMPROVEMENTS IN ANDROID 4.3 UPDATE
- GALAXY GEAR Support
- TRIM Support (Makes the device much faster)
- Samsung KNOX
- Samsung Wallet (Pre-loaded)
- Better RAM management
- Core UI elements updated to the ones on the Galaxy S4 (Galaxy S4′s theme all over)
- New Samsung Keyboard
- GPU drivers have been updated (Higher GPU benchmark scores)
- New Lockscreen: Multiple Widgets, improved ripple effect than Android 4.1.2, ability to change clock size and set a personal message
- New screen modes (From S4): Adapt Display and Professional Photo
- Daydream
- Driving mode
- Actionable notifications
- Move-to-SD-card feature
- New Camera mode : Sound and Shot
- New Additions in Notification Centre
- Completely revamped Settings UI (Tabbed interface – Exactly like the Galaxy S4)
- Implementation of Voice controls (Let’s you control various parts of the phone using voice commands – Galaxy S4 feature)
- New Samsung Apps: Calculator, Clock, Contacts, Gallery, Music
- Full screen Samsung apps
- New S-Voice (from Galaxy S4)

Download This

Android How to Upgrade Google Nexus 4 to Android 4.3 Jelly Bean

CyanogenMod 10.1 M2 Android v4.3 Jelly Bean provides an immense exhilaration to those LG Google Nexus 4 E960 users desiring to enjoy the features of Jelly Bean 4.3 ROM. CyanogenMod, also known as simply CM, is undoubtedly the most greatly acknowledged unauthorized Android firmware, and day-by-day they are increasing their compatibility with numerous old and freshly arriving Android devices from different manufacturers, including our LG Google Nexus 4 E960. Many reviews show that CyanogenMod provides much more facilities than the official Android firmware. Installing CyanogenMod 10.1 M2 Android 4.3 Jelly Bean JDQ39 on your LG Google Nexus 4 E960 will enable its user to sustain in the Jelly Bean environment.
So in this tutorial we will be showing you an installation guide regarding using CyanogenMod 10.1 M2 Jelly Bean 4.3 JDQ39 ROM on LG Google Nexus 4 E960. Just follow the simple steps given below:

Disclaimer:

This tutorial will definitely work when using LG Google Nexus 4 E960 only. While working of it on others is not yet confirmed. On applying this installation to another model or device may give an unwanted result. While applying this update we will not be responsible if anything occurs to your device, so continue at your own risk.

Pre-Requisite:

  1. For successful completion of this rooting process charge your phone up to a minimum of 75% battery.
  2. You must take a back-up of all your personnel items and other impotent data, such as Call Logs, SMS, Contacts, Audios, Images, Videos, APN (Access Point Names) settings, Bookmarks, MMS settings, on your phone.
  3. One must install a custom recovery image particularly for his Android device. To do this, ClockworkMod Recovery should be downloaded using the Internet.
  4. If you have not, then you must unlock your Android device’s Bootloader.

Steps for installing CM10.1 M2 Android 4.3 Jelly Bean JDQ39 ROM for LG Google Nexus 4 E960:

Step 1
From your Android device disconnect & remove the memory card and insert it in your Computer using a card reader. You must not use USB cable, since CyanogenMod do not work properly through USBs.
Step 2
Now do repartition of memory card, by just doing right click on the existing partition, choose Resize option, and then apply the sufficient amount of space towards your new partition. Make your new partition as your primary partition of Ext4 file system. Press the Apply option & remove your memory card now.
Step 3
Using the Internet, download: Android 4.3 CM10.1 M2 ROM for LG Google Nexus 4 E960.zip file and Google Apps in your Computer. Again reinsert it in the PC and then copy the above downloaded zip file in a folder named as “root” under your SD Card. Don’t run or try to open this file, just copy it in the folder.
Step 4
Now, remove your memory card from the Computer. Then shut-down your Android smartphone and then again insert back memory card in the phone.
Step 5
Now, enter into the Recovery Mode. For this just press the Down Volume & Home button simultaneously, and while pressing these buttons press down your Power button at the same time.
Step 6
Since you are now in the Recovery Mode, select the install zip from SD card” option, and then select the choose zip from SD card” option to browse into your SD Card. Now, navigate up to the downloaded Android 4.3 CM10.1 M2 ROM for LG Google Nexus 4 E960.zip” file for flashing it on your phone.
Step 7
Now get yourself back to the main menu by pressing back button and then reboot your Android phone.
Step 8
After this, you’ll have CyanogenMod 10.1 M2 ROM installed over your Android device.
Finished!

How to increase internal memory of samsung galaxy ace

Samsung Galaxy Ace is featured with 832 MHz Processor, a RAM of 512 MB, and a 32 GB upgradable storage. Like the previous Samsung’s Smartphones, it has also created a large user base or fan base. With an affordable price range, they also have provided some really good features with an elegant design and stunning look
Android Smartphone are an excellent way to take all your private and important files, images, data, and all other imperative data with you. Thus we can declare that it is one of the finest gadgets in our pocket which has plenty of information regarding you.
So in this tutorial we will be showing you how to increase the internal memory of your Samsung Galaxy Ace. Just follow the simple steps given below

Disclaimer

This tutorial will definitely work when using Samsung Galaxy Ace only. While working of it on others is not yet confirmed. On applying this installation to another model or device may give an unwanted result. While applying this update we will not be responsible if anything occurs to your device, so continue at your own risk.

Pre-Requisite

  • For successful completion of this rooting process charge your phone up to a minimum of 75% battery.
  • You must take a back-up of all your personnel items and other impotent data, such as Call Logs, SMS, Contacts, Audios, Images, Videos, APN (Access Point Names) settings, Bookmarks, MMS settings, on your phone.
  • One must install a custom recovery image particularly for his Android device. To do this, ClockworkMod Recovery should be downloaded using the Internet.
  • If you have not, then you must unlock your Android device’s Bootloader.
  • You must enable USB Debugging mode on your Samsung Galaxy Ace. Just follow, Settings–>Applications–>Development–>USB debugging. There select the USB Debugging icon.

Steps for Increasing Internal Memory of Samsung Galaxy Ace

Increase internal memory of samsung galaxy ace 
Step 1
Firstly, download MiniTool Partition Wizard app to your computer and then install it. You may download it by just clicking it here.
Step 2
From your Android device disconnect & remove the memory card and insert it in your Computer using a card reader. You must not use USB cable, since this app may not work properly through USBs.
Step 3
Now run the above downloaded app on your computer.
Step 4
Now click on SD card and there do the right click on the “Option” icon. Then select the “Delete” option for a complete deletion of data on your SD card.
Step 5
Now again do the right click on the “Option” icon. Then select the “Create New” option.
Step 6
Now, choose the file type as FAT32 and there allocate the space with such an amount that you believe you’ll be utilizing.
Step 7
Next, again apply the same procedure as above and choose “Create as: Primary”, so to create a new partition (external). This space will be utilized for storing downloaded apps.
Step 8
Finally, select the “Apply” option to finish the process. After this you may insert your SD card into your Samsung Galaxy Ace.
Finished!

All Tested Software Headline Animator

Please Log in